~ Policies and Procedures
Introduction
An IL Limited case option is available for those individual who would benefit from a limited number of service visits (two to three visits). Limited cases do not require the completion of an application or eligibility determination. You may complete an authorization for a Limited case.
Once you have determined that an individual requires only limited services, a Limited Case needs to be opened and tracked in eFORCE. The physical (paper) file location for clients with Limited cases will be County.
The following statuses apply to Limited cases.
01: Limited: In-Progress
27: Limited: Closed Successfully
29: Limited: Closed Unsuccessfully
Chapter Topics
Adding a New Limited Case
Before you add a Limited case, close the referral and enter your interview case note. You should also update information on the Client Data page as necessary. Once these tasks have been completed, use the New Case button on the Case Summary page. Complete these steps to create a new Limited case in eFORCE.
Step 1
Open the client’s record in eFORCE.
Step 2
Close the Referral.
Step 3
Complete the Interview case note. Be sure to mark the services that you may have provided during your visit.
Step 4
Choose the Client Data link in the Navigation bar to open the Client Data page.

Step 5
On the Client Data page:
Update the Blind Code and Blind Journal Date, as necessary.
Update the Address, Demographic, Disability, and Health Assessment fields, as necessary.
Step 6
Press Alt-S or choose the Submit button to save your changes.
A note indicating the client data has been saved will appear at the top of the page.
Step 7
Choose the Client Summary link in the Navigation bar to open the Client Summary page.
Step 8
Choose the New Case button below the Case History heading on the Client Summary page.
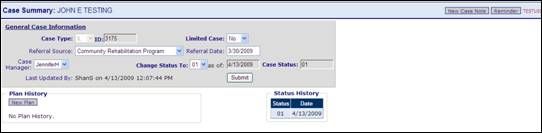
The Add New Case page opens.

Step 9
Complete these fields on the Add New Case page:
-
Choose the IL option in the Case Type combo box.
-
Choose the Yes option in the Limited Case combo box.
-
Choose the correct username in the Case Manager combo box.
Information in the Referral Source and Referral Date fields are pulled from the most recent referral.
Step 10
Press Alt-S or choose the Submit button.
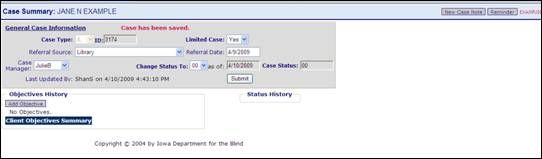
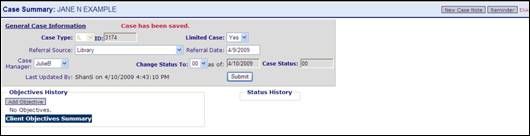
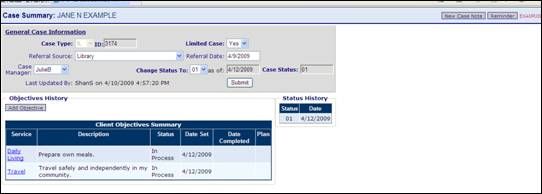
The Case Summary page opens. A note indicates that the case has been saved.
The status is “00” with the current date. The Objectives History section appears on the Case Summary page. The Add Objective button is available.
Only the following links appear in the Navigation bar for Limited cases: Case Summary, Authorizations, Closure, and Case Notes.
Next Steps
Once you have created a new case, proceed to Adding Objectives.
Adding and Viewing Objectives
Objectives are the specific milestones a person sets to achieve his or her independent living goal. Five types of objectives are available: Communication, Daily Living, Integration, Leisure, and Travel. These objectives reflect the area in which the individual wants to improve his / her independent living skills. For each objective listed, provide a brief description that specifies the task this person wants to accomplish. In Limited cases, you will likely only set one to three objectives.
Complete the following steps to add objectives to the Limited case.
Step 1
Ensure the Case Summary page is open.
Step 2
Under the Objectives heading, choose the Add Objective button.
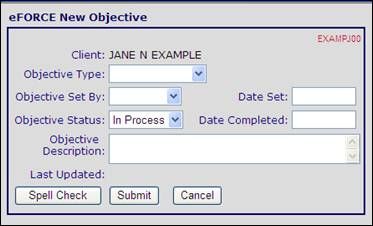
The eFORCE New Objective window will open.
Step 3
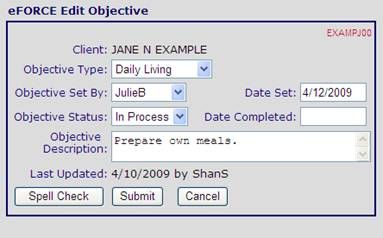
Complete the following fields:
-
Objective Type: Communication, Daily Living, Integration, Leisure, or Travel.
-
Objective Set By: Case Manger’s Username.
-
Date Set: Date objective was set.
-
Objective Status: In Process, Not Met, or Met
-
Objective Description: A brief, but descriptive statement regarding the objective.
Note. Objectives reflect the area in which the individual wants to improve his / her independent living skills. For each objective listed, provide a brief description that specifies the task this person wants to accomplish. For example:
1. Daily Living: Operate household appliances.
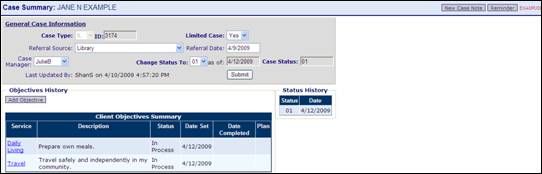
2. Communication: Use the telephone.Once you have added an objective, the objective information will appear in the Client Objectives Summary section. Also, the case status changes to 01. The status date will be the same date as the date set for the first objective.
Viewing Objectives
You can view the objectives set for a Limited case at anytime. From the Client Summary page, choose the Service History link on the Navigation bar. The Client Objectives Summary section will show the type of service for the objective, a brief description, status, date set, date completed, and type of plan.
If you want to access the objective’s fields, simple choose the service name link that corresponds to the objective you want to access. The Edit Objective window will open.
Closing Objectives
You should close the objectives once the client has either completed the objective or you have determined that the client will be unable to complete it. You must close all of the objectives before you close a Limited case.
Complete the following steps to update or close an objective.
Step 1
Open the client’s record in eFORCE.
Step 2
Choose the IL case number link under the Case History section on the Client Summary page.
The Case Summary page opens.
Step 3
Choose the service name link that corresponds to the objective you want to close.
Example: Select the Daily Living link to close the objective associated with that objective.
The Edit Objective window opens.
Step 4
Complete these fields:
-
Select either Met or Not Met in the Objective Status combo box.
-
Enter the appropriate date in the Date Completed field.
Step 5
Press Alt-S or choose the Submit button. Then, press Enter or choose the OK button to confirm change.
The Case Summary page is open. The Client Objectives Summary section will show the status as Met or Not Met and the date the objective was completed.
Step 6
Repeat steps 3 though 5 for each objective you need to close.
Closing a Limited Case
You should close the Limited case once the client’s training has come to an end. The closure process involves first ensuring that each objective set has a completion date and a status (Met or Not Met) has been chosen. Next, proceed to the Case Closure page. Whether the case closes successfully or unsuccessfully depends on the completion of the objectives. If the client met all or most of the objectives set, close the case as status 27 - Limited: Closed Successfully. If the client did not meet most of the objectives set, close the case as status 29 - Limited: Closed Unsuccessfully. You should also consider the client’s sense of accomplishment and success when determining whether the case has closed successfully or unsuccessfully.
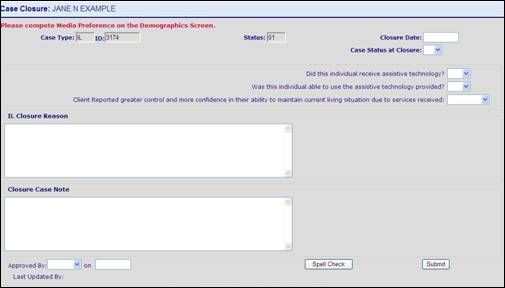
No matter the type of closure (27 or 29) you will need to provide a response to these three questions:
- Did this individual receive assistive technology? (Yes or No)
- Was this individual able to use the assistive technology provided? (Yes, No, or N/A)
- Client Reported greater control and more confidence in their ability to maintain current living situation due to services received. (True, False, or No Change)
You will also need to provide a closure reason and the case note on the Case Closure page. You do not need to print a Closure Amendment for a Limited case.
Complete the following steps to close the Limited case.
Step 1
Open the client’s record in eFORCE.
Step 2
Choose the IL case number link under the Case History section on the Client Summary page.
The Case Summary page opens.
Step 3
Ensure that all objectives are marked as Met or Not Met and have a completion date.
Step 4
Choose the Closure link in the Navigation bar.
The Case Closure page opens.
Step 5
Enter the appropriate date in the Closure Date field.
Step 6
Select the appropriate closure status in the Case Status at Closure combo box.
You may choose either 27 (Limited: Closed Successfully) or 29 (Limited: Closed Unsuccessfully).
Step 7
Select the appropriate response to the “Did this individual receive assistive technology” question. You may choose either Yes or No.
Step 8
Select the appropriate response to the “Was this individual able to use the assistive technology provided” question. You may choose Yes, No, or N/A for Not Applicable.
Step 9
Select the appropriate response to the “Client Reported greater control and more confidence in their ability to maintain current living situation due to services received” statement. You may choose True, False, or No Change.
Step 10
Complete the Closure Reason field.
Step 11
Complete the Closure Case Note field.
Step 12
Choose the Spell Check button.
The text from the closure fields will be copied into Microsoft Word.
If spelling errors are found the Spelling dialog box will prompt you to choose a correction or ignore the word.
If no errors are found, a dialog box will indicate that “Spellchecking has been completed.” Choose the OK button to return to the Case Closure page.
Step 13
Press Alt-S or choose the Submit button. Then, press Alt-S or choose the Submit button again to save the changes.
If you have not entered information into required fields, a dialog box will indicate which fields need data. (A red asterisk will appear next to the field.) Complete the fields as required. Then, choose the Submit button again.
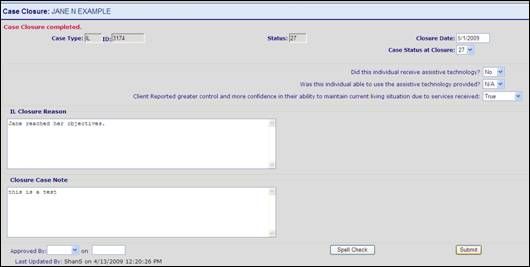
If you have entered information correctly, a note will appear at the top of the page indicating that the case closure completed. The Limited case is now closed.
Reminder: You do not need to print the closure information for Limited cases.
Converting to a Limited Case to an ILRP or Waiver Case
On occasion, you may have a client on a Limited case who decides he or she would benefit from more extensive IL services. You can convert these cases to an ILRP or a Waiver case without closing the Limited case. By converting the case, you will retain the open objectives and ensure that previously closed objectives are counted for reporting purposes. Follow all procedures and requirements for ILRP or Waiver cases once you have changed the case type.
Complete the following steps to convert a Limited case to an ILRP or Waiver case.
Step 1
Open the client’s record in eFORCE.
Step 2
Choose the IL case number link under the Case History section.
The Case Summary page opens.
Step 3
In the Limited Case combo box, change the Yes option to the No option. Then, press Alt-S or choose the Submit button.
The Case Summary page will not update until you select the Case Summary link again.
Step 4
Choose the Case Summary link in the Navigation bar.
The Case Summary page reflects the new case type. The Objectives no longer appear on the Case Summary page. You can now choose those links that are specific to ILRP and Waiver cases in the Navigation bar (Application, Eligibility, ILRP/Waiver, etc.). The status will remain in 01 until you add application and eligibility data. When you enter the plan information, eFORCE will automatically add any In Process objectives from the Limited case to the IRLP or Waiver.
Next Steps
Once you have changed the case type to an ILRP or Waiver, you may enter application, eligibility, and plan data. Do NOT enter a new case. The case number eFORCE assigned when you created a new Limited case will carry over to the new case type (ILRP or Waiver).
- Refer to the Status 02 - IL Applicant chapter for details on entering application and eligibility data and on printing the necessary documents for the case file.� (The case status will change to 02 when you enter application data.)
- Refer to the Status 10 - IL Plan Development chapter for details on entering ILRP or Waiver data and on printing the necessary documents for the case file. Subsequent statuses will reflect the ILRP or Waiver case type, not the Limited status types.
- When you close the case, you will complete the ILRP or Waiver closure page. The Closure Amendment will be available for printing.
Throughout the case, comply with all filing or correspondence requirements that are appropriate for ILRP or Waiver cases.
Reviewing Limited Case Reports
You can use the Master Status List report to review a variety of information pertaining to Limited cases. For example, you may review all open or closed Limited cases or review only the Limited cases from your caseload. Complete the following steps to review your open Limited cases using the Master Stats List report.
Step 1
In eFORCE, choose the Reports link in the Navigation bar.
The Reports page opens.
Step 2
Choose the Master Status List link.
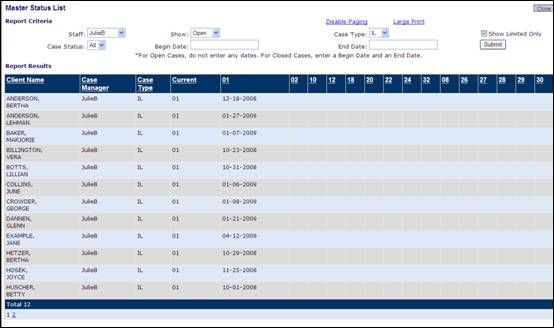
The Master Status List report window opens. You may use these fields to set criteria for the type of information you want to review in the report: Staff, Show (Open or Closed), Case Type (All, IL, or VR), Show Limited Only, Case Status, Begin Date, and End Date. Note: Only enter begin and end dates when you want to review closed cases.
Step 3
To show your open Limited cases, complete the following fields as directed:
-
In the Staff field, select your username.
-
In the Show field, select the Open option.
-
In the Case Type field, select the IL option.
-
Check the Show Limited Only check box.
Step 4
Press Alt-S or choose the Submit button.
The Report results will appear in the window. (You may choose the Disable Paging link to show all of the results in one window or choose the Large Print link to increase the font size for the report.)
Step 5
When you have finished using the Master Status List report, press Ctrl-W to close the window or choose the Close command on the File menu.